
How to wash your boat effectively and quickly just like a professional boat detailer
When it comes to washing your boat its not as simple as washing your car can be. Yes, I know you car guys are going to blast me for that statement but try covering the square footage of an 80′ yacht. Improper washing can result in stripping the wax off your boat, cause harm to your boats gelcoat or paint, ruin the vinyl or isinglass, among other things. The biggest piece of advice I cannot stress enough when it comes to washing your boat is to at a minimum ALWAYS rinse the salt off your boat. Salt for all you novices is corrosive and detrimental to a boats various surfaces including gelcoat, windows and aluminum. If you’ve ever noticed when your boat gets salty, it dries into crystals which, can be like sandpaper and then dew turns it back into saltwater.
My goal with this post is to educate and guide you on caring for your boat correctly. This way we prevent causing any unwarranted harm to our boats.
I am going to break this post into several facets:
Part1: What tools you will need clean your boat like a pro
Part 2: The process you should use to wash your boat
Part 3: What you should do after you finish washing your boat to keep it protected from the elements
Lets jump into it so you can be on your way to a beautifully clean boat.
Part 1: Supplies & Tools
The right tools and supplies make all the difference when it comes to washing your boat as efficiently and quickly as possible. Below is a list of everything I use to wash a boat week after week:
- 5 gallon bucket
- Good hose with proper length
- Plastic Nozzle
- Waterfilter
- Vinegar
- Sheepskin Wash Mit
- Expandable brush pole
- Various Brush heads
- Chamois’
- Waterblade
- Fresh Microfiber Towels
- A quality boat soap
- Magic Erasers
- Citrus Cleaner
- Spray Wax
I know the list looks intimidating and your probably thinking to yourself this guys out of his mind you don’t need this much stuff to wash your boat. Trust me you’ll need it all and then some, my team and I at L&I Marine wash upwards of 25 boats a week during the season up north and these tools make it run like clockwork.
5 gallon bucket
I’ve found that this is the perfect bucket size for washing. All of the brush heads will dip into the bucket easily and can keep some of your additional hand brushes, erasers and rags in there simultaneously. The bucket easily and neatly stores all of your wash gear essentials in there when transporting or storing your supplies in between washes. Its your typical bucket size that you’ll find in any local hardware store such as, HomeDepot. If the bucket is too small you won’t be able to dip the brush head in there adequately. Also you’re constantly re-diluting your boat soap and changing out buckets. Too big and its difficult to carry around the boat it doesn’t fit easily on a walk around and won’t find much room to store it in a fish box or lazarette.
A good hose with the proper length
This is a big one – how many times have you seen those nasty rubber marks on a boat from a hose drying out? You wind up creating more work for yourself, backtracking to clean up scuff marks left behind from your old hose. Also a cheap hose kinks and doesn’t uncoil easily, forcing you to constantly go back and unkink it. You look like a total amateur bro, running back and forth yanking on the damn thing.
Sure you can buy those white hoses from West Marine that everyone has on the docks but ill give you one better…I recently switched my entire hose fleet over to Flexzilla’s. They have no memory so the hose won’t kink, give it a slight tug to unkink the hose and won’t leave those nasty scuff marks I mentioned earlier. They have two plastic twists so getting the hose on and off the spigot and attaching the nozzle is simple. Just be sure to clear out all of the water when you’re done otherwise they won’t coil well – learned this the hard way.
The proper hose length is also imperative to washing your boat effectively. If its too short you wind up pulling on the hose and ripping it off the spigot not being able to reach the entire boat easily. Lets do some quick math. your boats length is 25′ and your spigot is off the stern by 3′ and you have a 25′ hose, do you have adequate length to wash your boat easily. No you don’t, you’ll be stretching to get those last 3′ of boat hoping theres enough pressure to reach what you can’t. Chances are you’ll have to get a 50′ hose unless you can find an intermediate size.
Plastic Nozzle
I love those cheap $2.50 nozzles for a couple of reasons. Lets say you drop your expensive $15 metal paperweight of a nozzle on your boats beautiful gel coat, you’re gonna have a nice war wound to remind you of your boneheaded move. Thats my biggest reason for the plastics because I have less chance of harming the boat in case it slips out of my hand or falls off of the rail. Secondly, they break and who cares if you break the cheapy, I’m really out no money in this situation. Third, these produce a killer stream. They have a ton of pressure and you can control it if you want to mist an area or really blast that dirt off your boat. Best of both worlds in one cheap package.
Stay away from the metal ones unless you don’t mind throwing a few voids in your gel and the salt will rust them anyway.
Waterfilter
This is one of my best kept secrets that saves me time on windows, metal and most importantly colored hulls! I’m not talking about a big fancy spot free system but a simple $30 filter you can find on boat owners warehouse. These simple charcoal based filters really help to cut down on hard water spots drying on your boat. As you move down the coast you’ll see how the water becomes hard and leaves nasty spots if you don’t dry it in time.
The filter easily attaches to the spigot then onto the hose and you have clean spotless water at a fraction of the price of an expensive filtration system that isn’t necessarily transportable.
Vinegar
Keeping with the water spot theme, vinegar mixed into your soap solution helps cut water spots and adds to your cleaning power without stripping wax. Its also great to rinse your chamois’ in vinegar helps clean them out as well. Its a great simple cheap additive that you’ll see marked improvement in your cleanings.
Sheepskin Wash Mitt
These are great, they’re soft, hold a ton of soap and thoroughly clean the surface without causing harm to it. Perfect for washing around houses, windows and other spots where you can reach by hand, they making scrubbing a breeze. They also make a pole attachment but I’m not a big fan of those very difficult to control so I stick to the mitts. Just dip them into the bucket wipe on the surface and you’re good to go.
Expandable Brush Pole
Depending on the size of your boat this will be a life saver! I like to use shurhold’s 9′ expandable pole – its perfect for reaching flybridges brows, and the waterline on larger vessels. Also, with its quick attach button swapping brush heads and chamois’ out is a piece of cake. The expandable pole will help you to wash hard to reach spots the right way rather than stretching to reach it and not washing it correctly from the get go.
Brush Heads
Having a good choice of brush heads to choose from is imperative to washing your boat quickly and efficiently. Sticking with the shurhold brand I like to use their brush heads. For my weekly care clients our go to is the blue brush head. It is the softest of all the heads and won’t scratch or cause harm to the boats surface. The next step up from there would be the yellow brush. The bristles are a little bit stiffer helping to agitate dirt that is a little tougher. Lastly, you would want the white deck brush for…you guessed it scrubbing the decks of your boat. Also a good stiff handheld brush will come in handy for those stubborn deck spots that the pole can’t agitate enough.
Chamois
A good chamois is a must – it will help you to put that spot free shine on your freshly cleaned vessel. You have two different types of chamois’ to choose from. A handheld chamois where you get a lot of friction on the surface and is great for drying windows and your other option is a mop chamois. This will attach to your brush pole and lets you get the reach you need on the higher spots. Sticking with the shurhold brand I like to use their chamois mops. I prefer to use the mop heads in lieu of the handheld ones for the sake of simplicity in my wash kit.
Water Blade
I discovered these gems a few years into my cleaning career and haven’t looked back since. When washing a boat you know just how much surface area you’re covering and a water blade helps to knock off so much of the water cutting your chamois-ing time down tremendously. It also gives your window that streak free finish we all want to achieve!
Fresh Microfiber Towels
You gotta love a crisp never before used microfiber. I use them for two different reasons when cleaning. I use one while washing to clean undersides of hardtops and inside hatches/fish boxes. The second is for final drying on windows and brightwork. The reason I suggest crisp ones is because when you use them for drying a new one will keep the cleaned surface clean and not dirty the boat back up with a towel with wax residue.
Boat Soap
A quality boat soap is probably one of the most important tools in your arsenal, without it you’re not cleaning the surface effectively and only causing your boat harm. Our proprietary soap is coming to market soon and I know you folks will love how easy it is to use and how deep cleaning it is helping to get salt, dirt and fish grime away with ease.
Magic Erasers
I know this is a hot topic where some people are pro magic erasers and others are vehemently against them. I fall into the former category, these are perfect for getting scuffs off the deck of the boat and that extra tough dirt in the decks. What about cleaning seats you say? Yes, I know some people say yay others nay, again Ive used them on certain types of vinyl and have never had a problem with it. Just like anything else be wise when using them since they are basically microfine sandpaper.
Citrus Cleaner
A good citrus cleaner provides a deep clean on bird dropping stains, grease, fish blood remains and any other tough dirt. I like to spray it on the decks to help clean it when you need that extra bit of oomf. Be careful which product you choose if you get one that is too strong you will see it discolor the gelcoat and you’ll know where you sprayed it for sure. I stick to spraying on the decks and sparingly on a rag to avoid causing unwarranted harm to the boats gelcoat. My goto brand is Zepp’s heavy duty citrus cleaner, it works wonderfully and doesn’t cause any discoloration on gelcoat. Its not overly harsh as other cleaners such as, roll off which is crazy strong and strips everything in its path.
Spray Wax
Last but not least, a quality spray wax or sealant to help preserve the boat in between major waxings. There are a variety of different spray products to choose from. I personally use a product called Reel Shine Replenish its a mild ceramic coating spray sealant that has provided great durability in-between waxing or sealing my clients boats.
Part 2: Steps On How To Wash Your Boat
Now that we have all the supplies we need to wash our boat, lets learn the steps involved to wash your boat the correct way so we don’t harm our vessels surface.
Before We Begin
Lets get all our supplies to where we are going to start. Don’t fill up your bucket until your ready to start scrubbing. This way we don’t have to lug our heavy 5gal bucket up and around from the get go especially if were climbing up a bridge or tower. When we get our bucket to where we’re starting and we have our hose pulled out we need to put some soap in our bucket. Squirt enough in that you feel comfortable with but don’t put too much in, it makes it difficult to rinse all of the soap residue off. Its also best not to put your accessories in the bucket till you fill it up it will absorb the soap before your wash bucket can. Once you have it filled up feel free to put your erasers, hand brush, clean microfiber and wash mitt in.
Where To Start
First, we’re going to wash the boat from the top down then bow to stern. If you have a flybridge, tower or hard top start up there. Thoroughly rinse the entire surface to get any loose dirt off the area this way we don’t risk scratching the gelcoat or paint. After we’ve rinsed our area its time to scrub. I start with scrubbing the entire deck. If the deck is just normal wear and tear I use my blue bristle brush and will scrub with the hand held stiff brush if the dirt is really baked in or magic eraser for scuff marks on the deck.
Once you’ve finished scrubbing your hard top or bimini give it a rinse to see if you got all the dirt off or you have to give it another pass. All of the suds will make it look like the surface is entirely clean but there may be some spots you missed underneath them. If thats the case then hit those spots and rinse again and lets move on to the next section.
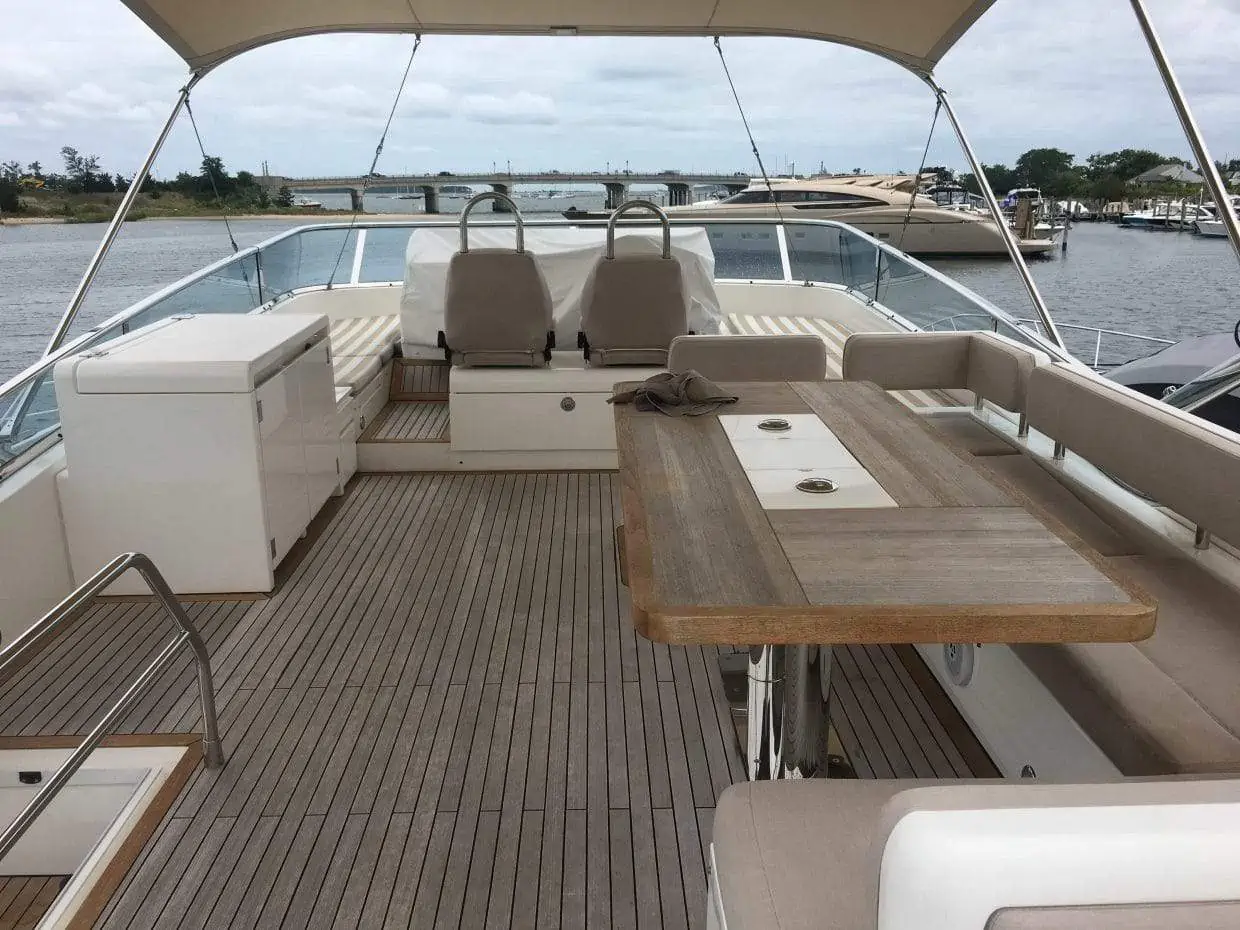
The Bridge or Tower
Now if we have a tower or bridge its time to clean the seating area and controls. When it comes to the controls you don’t want to soak them with the hose, be gentle. Lightly mist the helm area as to not cause any harm to the instruments or controls. Grab your wash mitt and start scrubbing all of the smooth surfaces and seating. Break it into small sections so as to not let any soap dry and leave behind soap stains and having to rewash the area. Scrub and rinse and move onto the next section.
After you’ve washed all of the seats, pipework and smooth surfaces, grab your microfiber towel from the bucket and wring it out thoroughly. Life up all of your cushions if you’re able to and wipe under there to get rid of any dirt. I like to leave the cushions leaned against the back rests to let them drain and dry thoroughly while you continue washing the boat. Rinse and re wring your towel as need be. The last piece you’ll need to use your towel for on the bridge or tower is for the underside of the hardtop.
Instead of hitting the underside of the top with the hose making a mess and soaking yourself in the process using the microfiber is a neater way to get the surface cleaned. Wring it out and fold it neatly into quarters and wipe the underside. This will get all of the dirt that finds its way up there and you don’t soak everything. Fold the towel over and rinse as need be.
Bow To Stern
After having fully washed our hardtop bridge and/or tower lets jump down and start at the bow. I prefer to start with a fresh bucket of soap and water when I move lower if I cleaned a bridge. So dump your bucket out and put some fresh soap in and lets start working our way back. I like to rinse the entire bow area including the hull sides. This way I get all of the jet fuel, air born elements and other dirt off before cleaning.
Now that our surface is free of loose debris and wet lets scrub the decks first again. If its teak decks its ok to scrub them with some soap and water too. Then wash all the smooth gelcoat including foredecks and brows if its a sporty and any windows up front. Soap down any metal work and rinse all of your soap off thoroughly. After you’ve done this its time to scrub the hull sides up to where you stopped washing the top deck. I wash the hull sides after the top since soap residue will run down the sides and this allows a streak free wash. Also note, this is where your expandable brush pole comes in handy to reach down low around the waterline and the flybridge.
Anchor Locker
If you have an anchor locker, pop that hatch up and use your microfiber towel to clean the track, underside of the hatch and rinse down your rope or chain and clean the bulkhead walls of the locker. Then I leave the hatch open while I wash the rest of boat to let it dry, preventing mold and moisture from happening in the locker.
Pick A Side
Now that our bow and foredeck are done its time to start working our way back. Most likely your going to work down the side you ran your hose up. Repeat the same process we used on the bow and work along the whole side port or starboard. Starting with the superstructure first then moving onto the hull.
After you’ve completed one side, walk the hose and all of your accessories onto the other side and repeat. Making sure to clean all windows and hatches along the way. By this point its usually time to empty your bucket and start fresh again.
Stern/Cockpit
Now that we’ve done three of the four sides of the vessel its time to clean the stern/cockpit area. Its here that you will take some time because it gets more intricate. You will have some seating to clean, hatches to wash and the deck sees the most use. Follow the same process we’ve used on the other sides and the bridge of the boat to get this area clean.
Washing your boat like a professional is starting to look easy, wouldn’t you agree? Were not done yet though. Theres a few pieces of the puzzle we haven’t discussed yet.
Isinglass
Isinglass is an expensive fix on your boat and the last thing you want to do is care for it incorrectly. I avoid washing it with standard soap and water. What I like to do is rinse it completely as I clean that area of the boat and dry it with a clean microfiber This way I don’t risk yellowing the glass and scratching it by drying it with surface dirt on it. Afterwards, you can go back with your preferred isinglass cleaner and clean it with that instead of soap.
The Drying Process
I know its crazy theres a method to drying a boat correctly. You can’t just wash the entire boat and then go back and dry the boat like you would a car. Theres too much surface area and too much scrubbing involved to do this, by the time you would finish washing the whole boat it would have air dried and probably with water spots.
I do like to let some of the boat air dry this way its not as much chamois-ing. Just like washing break it into sections. For example:
- Wash entire flybridge then dry entire bridge
- Clean bow then dry it
- Wash port and starboard side then dry each side respectively
- Clean and dry cockpit and stern
- Dry the hull sides as you wash them
I like to take the water blade to each section first especially the windows this way its much easier to chamois after. Breaking it into sections is the best way to ensure there are no hard water spots and the end result is streak free.
Once I’ve washed and dried the entire vessel, I circle back with a clean microfiber to give the boat a final wipe to rid the boat of any water spots. I mist the towel slightly, this way it removes any spots left on metal or windows and truly mints the boat out.
But WAIT…theres more to washing your boat we’re so close to being done.

Part 3: After Washing Your Boat the final tips to making her look freshly detailed
Theres a few key elements I haven’t touched on yet that I perform on my weekly washes that keep them looking freshly waxed in between major waxings. Wee need to rid our boat of those pesky black streaks and put some light protection on her.
Black Streak Removal
If you’ve washed your boat before you know all too well about those black streaks that show up all over your boat in the same spots week after week. They typically form at runoff spots, where the anchor locker drains, flybridge drains, etc. And for the life of you no matter how much you scrub they just don’t seem to come off when you wash the boat with soap and water, WTF, right?! Below are three efficient options for removing black streaks while washing your boat.
Option 1
I bet you tried using those black streak removal sprays too, stop! Don’t use those anymore its going to strip the wax off your boat despite what the label may tell you. Theres an easier way, much easier at that. As your doing final drying process with your slightly damp microfiber spend a little time wiping back and forth on the streak and chances are it will disappear right before your eyes. Best part about this is you’re already doing this step and not causing any harm to the wax because theres no extra products involved.
Option 2
If that doesn’t cut it then we have option #2. This is also involved in your normal washing regiment so you’ll be doing this option also. Typically adding a little lubricant from your spray wax will help to remove the black streaks. Ill touch upon this more in the following section.
Option 3
Last but not least if that doesn’t get the streaks out, lets take a dab of cleaner wax to the area, and that will remove it 100%. Best part about option #3 is that you’re adding protection to the boat. Only downside to this is if its time to wax the boat and theres oxidation on the surface your gelcoat will look patchy. There is another product I would recommend and its called Triple P by Reel Shine, it contains some silica so it will remove the black streaks as well and doesn’t cut as deep as a cleaner wax would.
Weekly Protection
The last piece to the proverbial puzzle, is a little bit of spray wax or sealant. Walk the aisles of your favorite boating store in the detailing section and you’ll find many different options to choose from. Pick your preferred spray and its time to apply it to the entire boat. This helps to keep a layer of protection on the boat in between major waxings and makes it easier to keep the boat clean week in and week out. Spray it on the surface and wipe it into the gelcoat till its fully worked in.
After you’ve done this you’re completely done washing your boat, for the week at least… I know it seems overwhelming at first but the key is to get a rhythm going and the more you stay on top of your boat the easier it is to keep it clean. Once you get used to the process you’ll see it will take you about the same time every week. It could be 20 minutes, an hour, 2 hours or more all depends how quick you can move and how big your boat is. Washing your boat is simple and enjoyable when you make sure to make it part of your normal yacht care regiment.
If you have any questions or would like some product recommendations please leave your requests in the comments section below and I’m happy to help you out. This is the same process my team and I at L&I Marine use on all of our weekly wash clients for their boats.

